
So how does this relate to running? Well, it does - barely. Photography is a great tool on the internet and in blogs. When I post a picture I want it to mean something, I don't just want an "insta-gram" of whatever random thing I grabbed a picture of. I make these recommendations because I believe anyone, anywhere, with any camera, can take great pictures to capture their life with. If you only get one chance to capture something, make it count.
Photography Rules I Live By
First and foremost, your camera does not matter (okay, just a little). I can't say this enough. I'm amazed by the number of tourists I see on trips with overpriced, SLR cameras taking terrible pictures. A simple point-and-shoot is usually adequate. Heck, you can even produce professional quality results from an iPhone camera (one of my favorite cameras actually). Yes, you can get better results from a giant SLR camera, but you won't want to bring it anywhere, and you have to hang it around your neck. Photography should be spontaneous - that's why having something that will fit in your pocket is key - as the saying goes, Less is [often] more. |
| Seriously, how far are you going to make it carrying around this monstrosity! |
Next, please set your camera up correctly. Anytime you are ever in doubt, please just set everything to auto. It will look fine. I'll never understand people who fiddle with the ISO, White Balance, Aperture Size, and Color temperature, just to have their pics come out blurry, washed out, or underexposed and not know how to frame things.
Personally, I like to set the color option to "vivid" (giving colors a little more contrast and "pop"), turn on any over-exposure correction to "auto", set the preview grid-lines on (usually by pressing the display button), and turn off the flash. I also got in a habit of reducing the picture size down to 8 or 9 megapixels to save on memory space, but now that you can get a 32 Gig SDHC memory card for cheap you can just leave it on full megapixels. I only adjust the finer controls when the picture calls for it. There is a nice feature under "White Balance" called a "Tungsten" filter - this is for shooting inside where light can make your pictures appear yellowie. The filter compensates to make things look clear. All that being said, the iPhone camera is auto-everything and I've taken great pictures with it.
One of the best kept (or maybe worst kept?) secrets of photography is to go by thirds. Once you have those handy grid-lines on, which divide the frame into thirds both horizontally and vertically, keeping points of interest in the intersection of the lines is usually pleasing to the eye. If its an ocean pic, try for 1/3 sky, 1/3 water, and 1/3 land. If its landscape, try for 1/3 foreground, 1/3 middle ground and (you guessed it), 1/3 background (which is often the sky). Sometimes you will want your subject smack dab in the middle, but still use the 1/3 rule to have some space on their sides to kind of frame what you are looking at.
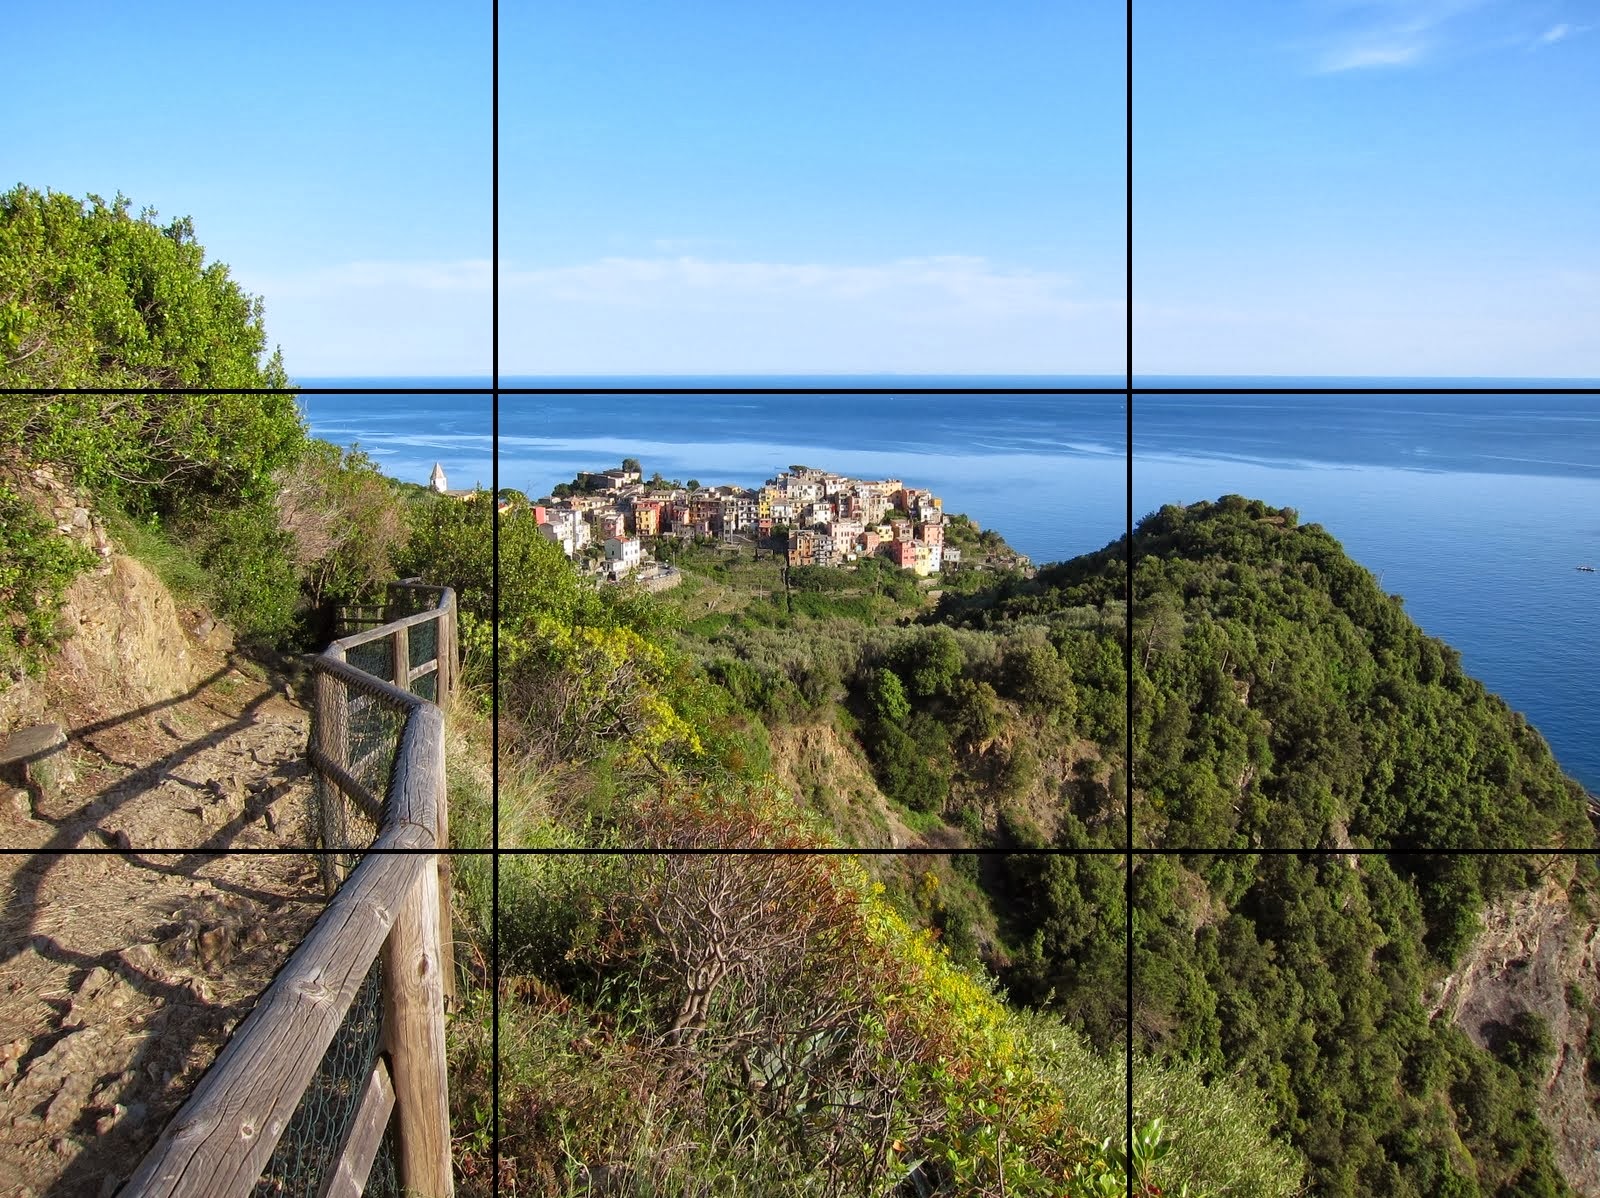 |
| One of my favorite pictures I took in the Cinque Terre region of Italy with some 1/3 grid-lines crudely drawn on. Observe how things line up with the lines, spacing, and intersections. |
 |
| Another favorite of mine taken outside of Cuzco, Peru. Note the foreground, middle ground, and background; and the donkey is on the right 1/3 line. |
The grid lines are also handy for lining up the horizon to be level. Nothing can ruin an otherwise perfect shot by a crooked horizon, so be careful to get it straight. You can rotate the picture later during post-processing, but you lose some picture quality, plus its just a pain.
 |
| Back-lighting! This poor guy - all we see is a shadow! |
 So what if its really cloudy or foggy out? You'll have no contrast between your subjects and their surroundings. Instead, make sure there is plenty of background to create a contrast. If you are skiing and its snowing out, take pics of people with trees behind them.
 In the picture to the left - it was actually cloudy out. We found a good backdrop standing by the National Cathedral. Add in some opportune expressions and a little post-processing to adjust the contrast and you end up with a nice pic!
Remember to fill the frame with interesting stuff. Make your picture like a really interesting story. Sometimes you do just want a picture of one thing, but usually you want to make your picture interesting. Just think, you could just take a picture of the Washington Monument and treat people to a giant tower (obelisk to be exact) - kind of boring in my mind. Or you could pull back - way back - until you fill the frame with the DC skyline!
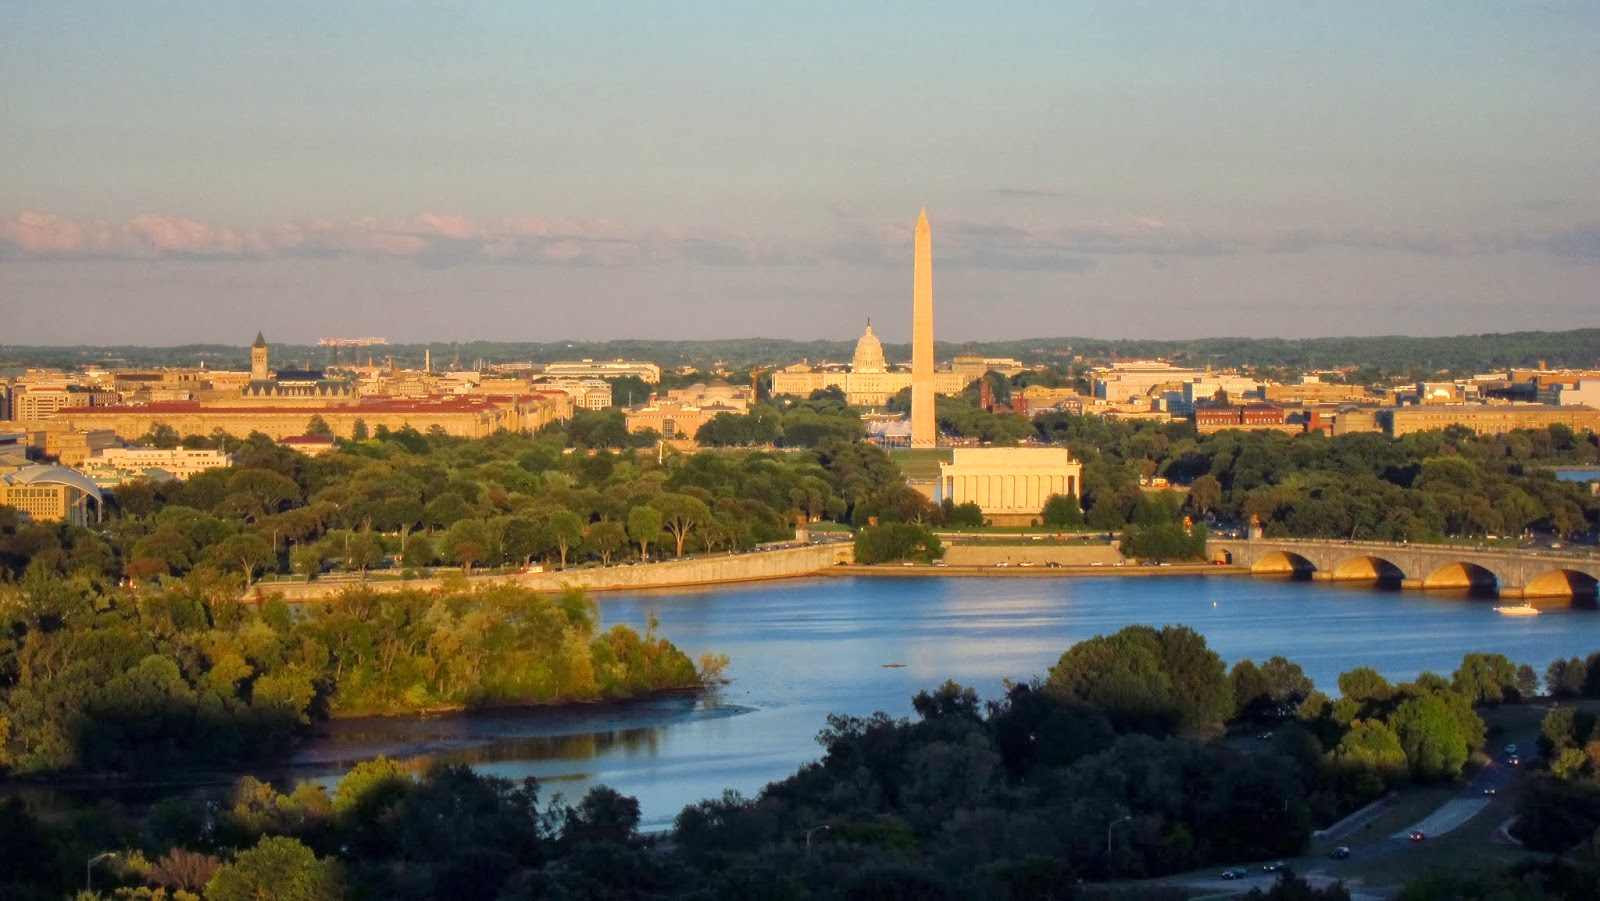 |
| The DC skyline - so much to see! |
Next up, mostly for people pics, but also for things like buildings or mountains - please stop cutting peoples' heads and feet off. I've had to have many pictures retaken when people cut off the top of my head, or made it look like I'm balancing on my ankles. Its not hard - just look at the preview and don't cut anything off. Also check to see if there are any obvious distractions or objects that look out of place. Don't make it look like a pole is coming out of someone's head! If there is a bag of trash or something unsightly around keep it out of the frame or move it. Major problems easily solved. If you want to get picky, try not to cut off shadows of people either if its sunny out.
 |
| Don't ask me to explain why - this is still one of my favorite pictures I've taken. Of my dog, curled up in some sheets, from an iPhone 4s camera. |
More tips:
- Always take 3 or 4 of the same thing. If you think you've got a great picture lined up, take several of the same thing just from slightly different angles. Same for shots of people, their expressions will all be slightly different - this way you can choose the best one.
- Close one eye - when you are lining up a shot if you close one eye this gives a better indicator of what the picture will look like. Since we see in stereo vision (2 eyes) this will simulate a picture, which appears flatter since its a single lens.
- Don't over zoom - underzoom and then crop later. I can't tell you how many times I've told people "Please don't zoom in!". Cameras nowadays have way more megapixels than you could ever need, so you can always just crop it down later.
- Careful about reflecting sunlight and lens flare. You can make neat affects with reflections (light bouncing off of water, car windows, whatever) or lens flare (which is when too strong a light source gets scattered in the lens and creates a bright "starry" image) but beware of unwanted instances of these.
- Ask yourself: will I want to look at this again later? Don't just "take take take" for the sake of using your camera, stop and think if after you download this to your computer would anyone want to look at it.

- Steady hand, hold your breath, then exhale and shoot! Nothing ruins a picture like a blurry scene caused by handshake. I've heard if you take a deep breath and then exhale when taking the picture it makes it easier to steady your hand. You can even rest your hand on a tree or rock if you need to.
- Post-processing can turn good pictures into great ones! Programs like Adobe Photoshop or GIMP (GNU Image Manipulation Program) are nice for advanced users, but I usually prefer Google Picasa. Just to make a few quick adjustments - crop it the way you like, adjust the contrast with auto-contrast (this makes a huge difference), and maybe even brighten or darken it.
- Finally, don't be afraid to bend the rules and get artsy!!


Photography is fun! And there are great pictures everywhere. So grab your point-and-shoot, head out the door, and see what you can find!
